# Auth
Auth section is where you do authentication configuration. Usually, most API services require authentication to prevent unauthorized requests.
Mini-App V2 system support 2 types of authentications, **Api Key** and **OAuth v2**.
### Api Key
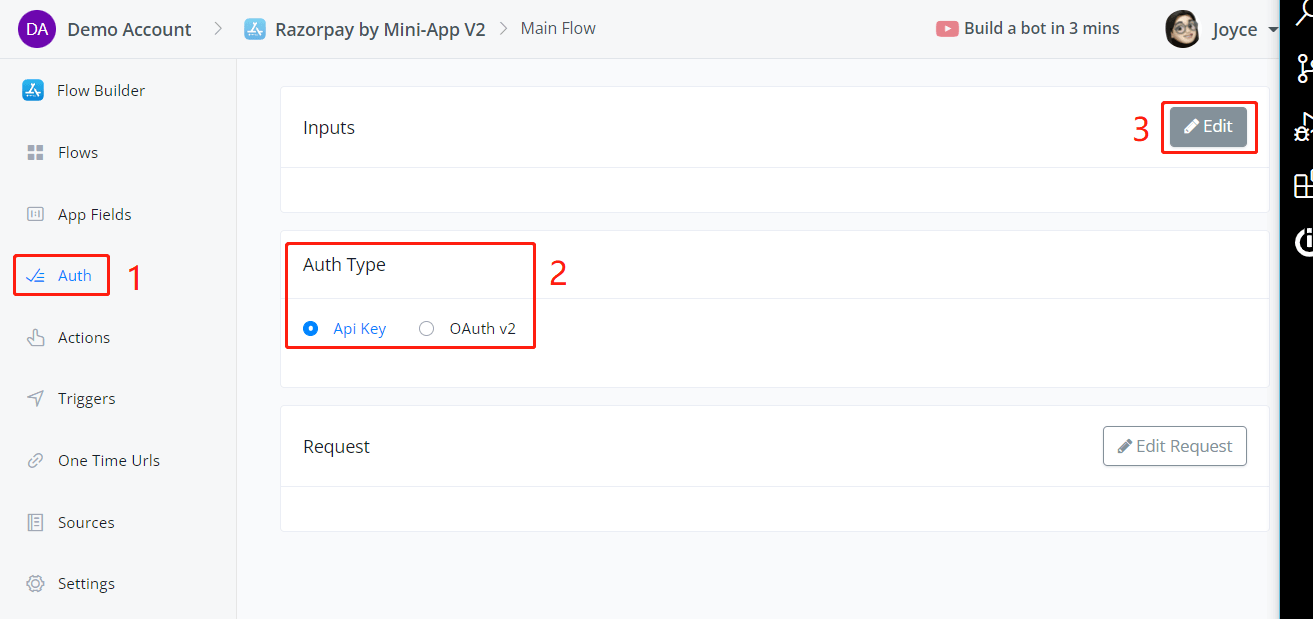
Choose **Api Key** in the **Auth Type** and click on **Edit**, then **Add Items** to add auth inputs.
| Parameters | Description |
| ----------------- | ------------------------------------------------------------------------------------------------------------------------------------------------------------------------------------------------------------------------------------------------------------- |
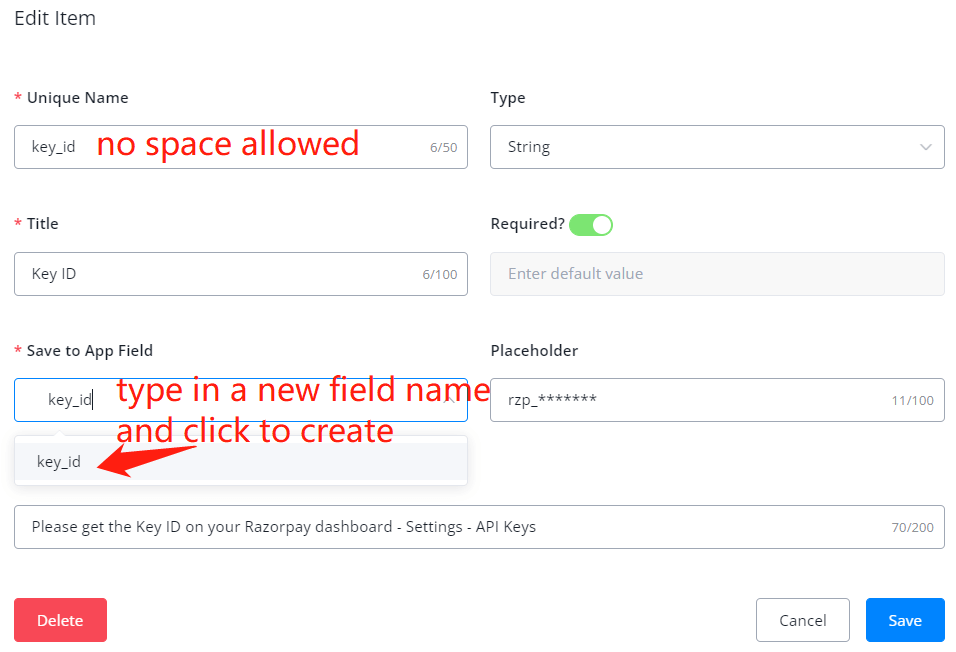
| Unique Name | Unique in all auth inputs, you are unable to insert a space. Use underscores or hyphens to separate words |
| Type | Choose **String** for text without carriage returns, **Number** for integer or float numbers, **Text** for text with carriage returns, **Select** for [static or dynamic source](https://docs.rapidbott.com/help-center/mini-apps/mini-app-2.0/sources) input |
| Title | Title shows on the user interface |
| Required? | Is this input a must? if not, switch off and provide a default value if needed |
| Save to App Field | Specify where to store the value. Create a new app field right here by typing in a new field name and selecting a field type in the pop-up, or search an existing field |
| Placeholder | Grey prompt shows in the input box |
| Description | Black prompt shows under the input box |
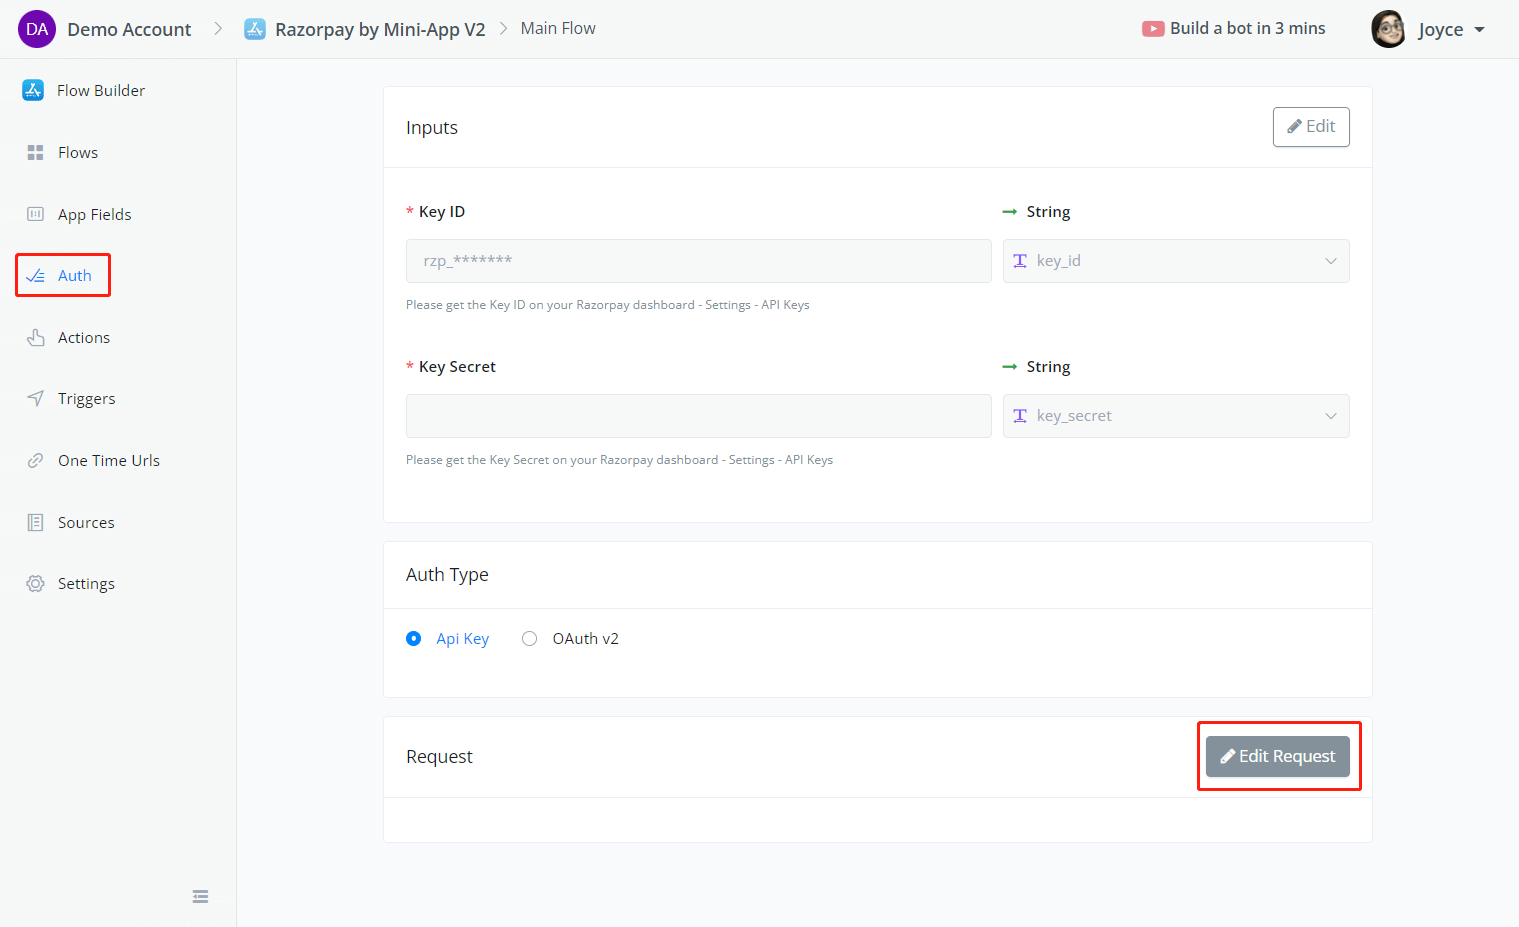
Add as many auth inputs as you need, click on **Save** when you finish.
### OAuth V2
Choose **OAuth v2** in the **Auth Type** and configure the 3 steps shown below it.
### Auth Request
If you need to send the auth inputs to get more information, use **Auth Request**.
For example, some third-party service providers require users to provide their `username` and `password`. And with these 2 values, they generate a token for later communication in a few hours.
In this case, you can gather `username` and `password` in auth inputs and send the token request in **Auth Request**.
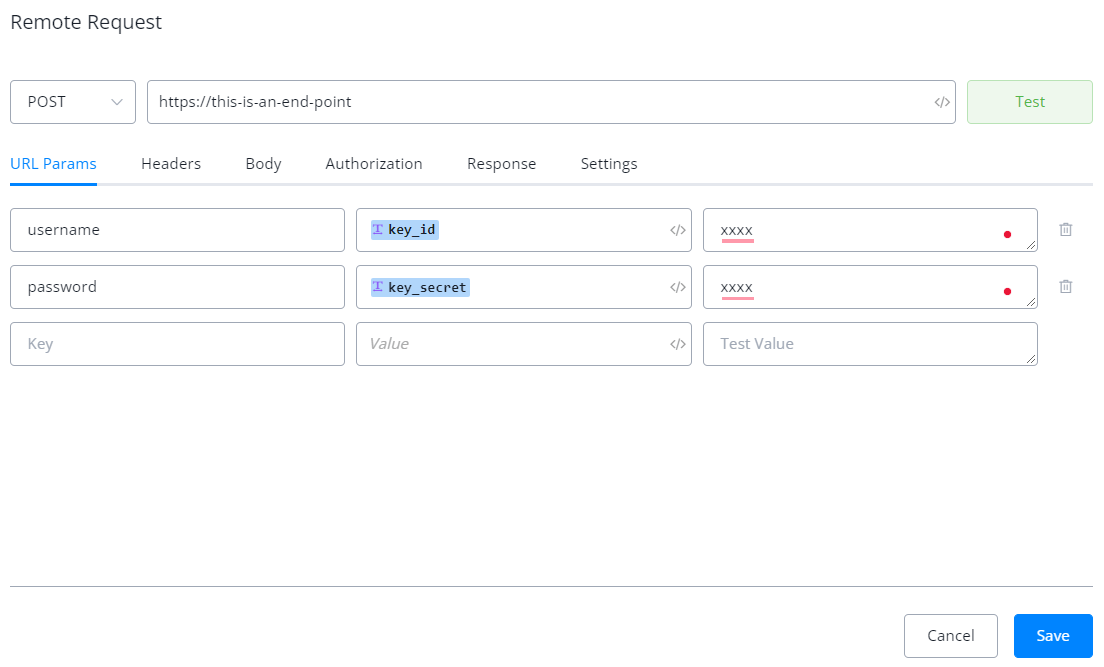
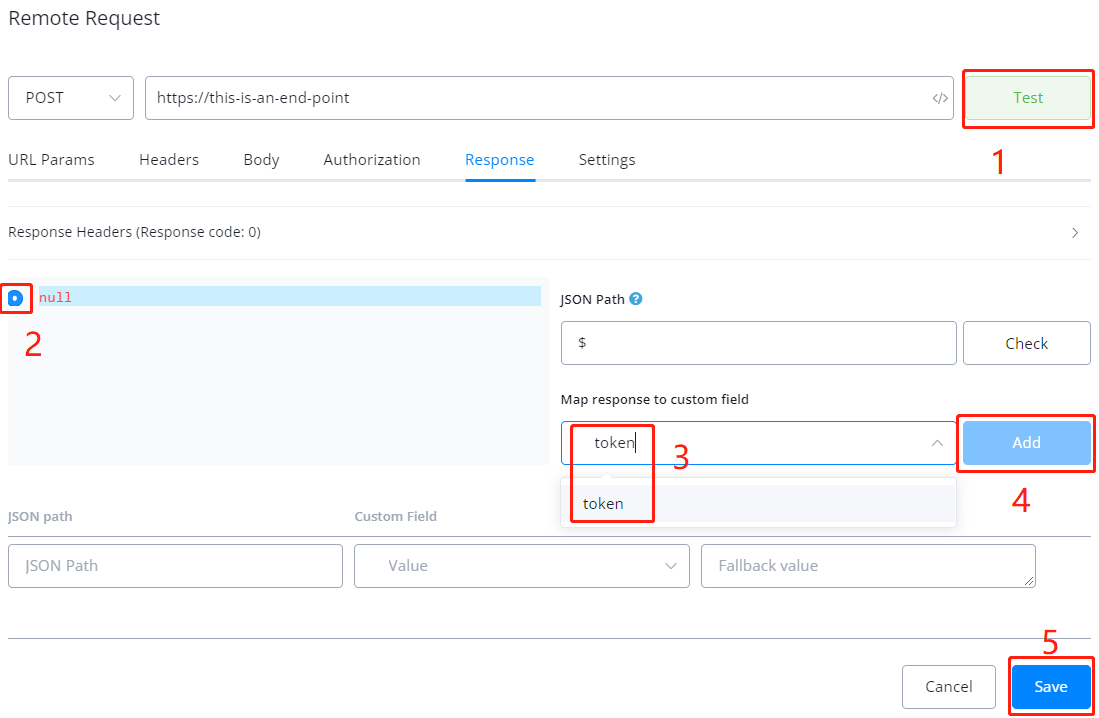
Configure the [external request](https://docs.rapidbott.com/help-center/flow-builder/advanced-actions/external-request) and click on **Test**, you will see the data you need in the response area. Select the token and map it back to the app by clicking the **Add** button. Click **Save** to save your auth request: